AI
How to remove objects from photos
Erase photobombers, wires, signs and blemishes from a photo in your browser. What AI inpainting can and can't do, and the one habit that fixes most bad results.
Last updated August 12, 2026
You lined up the perfect shot and someone walked into the frame. Or a stray wire cuts across the sky, a bin sits in the corner, a smudge marks the wall. Removing that one thing used to mean opening a desktop editor and cloning pixels by hand. AI object removal — also called inpainting or a magic eraser — does it in a couple of seconds: you brush over what you want gone, and a neural network rebuilds the background that was hidden behind it.
This guide covers how it works, how to get a clean result the first time, and where the technique reaches its limits. The whole thing runs in your browser with the object remover — nothing is uploaded.
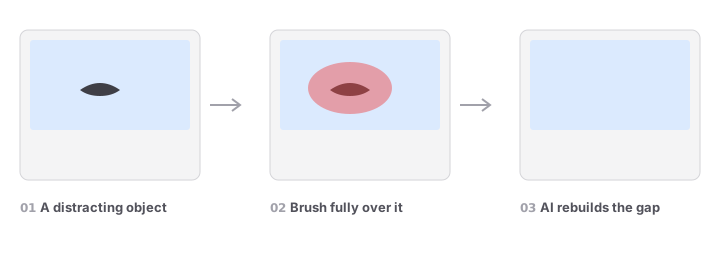
Inpainting is the opposite of background removal
It helps to know exactly what the tool does, because it is the mirror image of background removal. Background removal keeps your subject and deletes everything else — it never invents a pixel. Object removal deletes the thing you point at and then has to invent what was behind it, so the hole looks like it was never there. That second job — synthesising believable new texture — is a generative task, and it is why the background behind the object matters as much as the object itself.
Step by step
- Drop a photo. One image; it stays on your device.
- Brush over the object. Paint across the whole thing — body, edges, and any thin parts like wires or limbs. Use a bigger brush for the mass and a smaller one to chase the thin bits.
- Press erase. The AI fills the gap in a second or two. The first run downloads a small model (about 28 MB) and caches it, so every erase after that is instant.
- Compare and download. Toggle between the result and the original, then save the PNG.
The one habit that fixes most bad results
If an erase leaves an ugly smudge, the cause is almost always the same: the mask didn’t fully cover the object. The model only rebuilds what you paint over. Anything you leave behind — a wingtip, the tail of a wire, the edge of a shadow — not only stays in the photo, it actively poisons the fill, because the model reconstructs from those leftover pixels and drags their colour inward.
So the habit is simple: paint past the edges, not up to them. A mask that spills a little onto clean background almost always beats one that stops short, because the surrounding area gives the model honest context to copy. When in doubt, cover more.
What erases cleanly, and what fights back
The size of the hole relative to its surroundings is what separates an easy job from a hard one.
- Erases cleanly — small-to-medium objects with plenty of consistent background around them: a bird in the sky, a person on grass or pavement, a sign on a plain wall, a spot on a product. There is enough real context nearby for a convincing fill.
- Fights back — objects that fill most of the frame, and structured backgrounds the model has to reinvent: brick courses that must line up, railings, printed text, or another face. The fill stays plausible but can look soft where it had little to go on.
- A trick for big erases — if one giant stroke comes out mushy, remove the object in two or three smaller passes so the model always has nearby background to lean on.
A fair expectation: this is on-device inpainting, small and fast, not a giant cloud model. It is superb at tidying a shot and honest-to-goodness magical on the everyday cases — it just won’t convincingly paint a whole new scene where an object used to dominate the frame.
After the erase
A retouch is rarely the last step. Cleaning a product shot? Erase the clutter, then cut out the background for a transparent PNG, or upscale a small result to a usable size. Headed for the web? Run the finished image through the compressor to bring the file size down. Every step runs on your device, so the image never has to be uploaded to move from one tool to the next.
One thing the tool deliberately won’t do: strip visible watermarks or hide that an image was AI-generated. It’s built to retouch your own photos, not to misrepresent someone else’s.
Try it now — Remove objects in your browser, nothing uploaded.