Background
How to remove an image background for free (no upload)
Cut out the background of any photo right in your browser using an on-device AI model — no account, no watermark, and your image never leaves your computer.
Last updated August 1, 2026
The one-minute version
Drop a photo into the background remover, wait a few seconds while it runs, and download a transparent PNG. There’s no sign-up, no watermark, and no upload — the whole thing happens on your device.
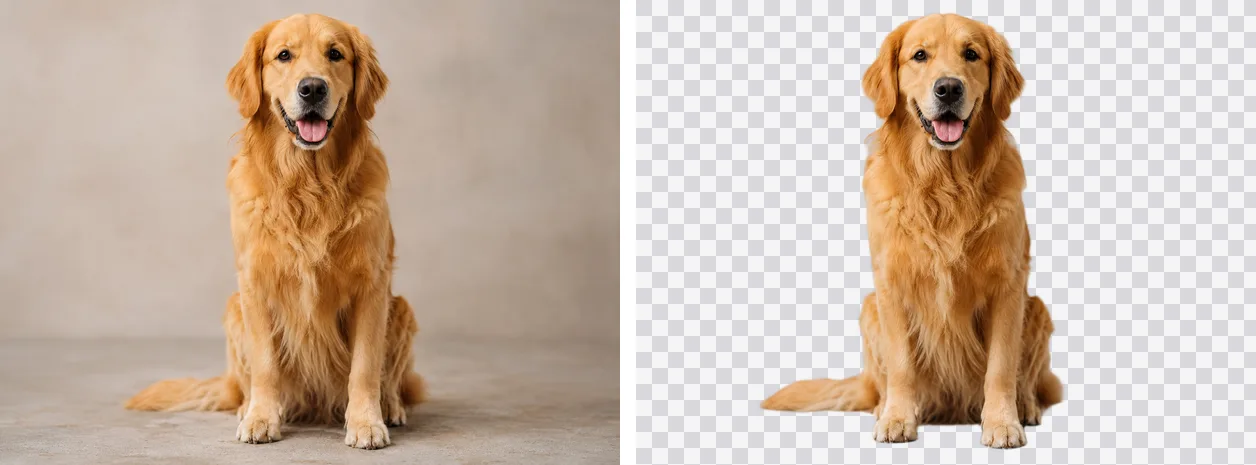
A real cut-out from this tool — nothing retouched by hand. The checkerboard marks where the background became transparent, right down to the fine fur along the edges.
Two tools, two different jobs
Ruah has two background tools, and picking the right one is half the work. The AI background remover reasons about the subject: it finds the person, product or object and lifts it out, whatever sits behind it. The colour eraser reasons about the background: it clears one flat colour or a smooth gradient and never touches anything of a different colour. So the choice comes down to what’s behind your subject, not what’s in front of it.
| Your background | Best tool | Why |
|---|---|---|
| A photograph — a room, a street, grass | AI cut-out | It understands the subject, so a busy scene doesn’t confuse it |
| A flat colour or gradient — white studio, a logo’s fill, a sky | Colour erase | Clears by colour and never nibbles fine foreground detail |
| Hair or fur against a scene | AI cut-out | It predicts a soft matte, keeping flyaway strands |
| Grass, foliage or thin lines on a solid backdrop | Colour erase | Deterministic — thin detail survives exactly as drawn |
A quick rule of thumb: if the background is a scene, cut the subject out; if the background is a colour, erase it. The rest of this guide is about the AI cut-out — the tool most people want.
How it works (and why there’s no upload)
Removing a background well used to require either a steady hand with a selection tool or a paid online service that uploaded your photo to its servers. Neither is necessary anymore. A compact AI segmentation model can now run directly in your browser, using your device’s graphics hardware (WebGPU) when available and falling back to a slower on-device mode when it isn’t.
The practical upshot: your image is analysed and cut out locally. The only thing that ever gets downloaded is the model file itself — about 90 MB, the first time you use the tool — after which your photo stays entirely on your machine. That’s a real privacy difference from upload-based services, and it’s why the tool works even on private or sensitive images. Rather than matching colours, the model predicts a matte — a soft, per-pixel map of how much each pixel belongs to the foreground — so a single strand of hair can be half-kept instead of crudely clipped.
What the AI cut-out does well
Because it reasons about the subject rather than the colour behind it, the model copes with scenes a colour eraser would choke on. It is at its best with:
- Hair and fur edges. The soft matte keeps flyaway strands and fuzzy outlines instead of leaving a hard, cut-with-scissors line — the single hardest thing to do by hand.
- Product shots. A single item on a busy surface lifts cleanly, ready to drop onto pure white for a marketplace or catalogue.
- One clear subject. A portrait, a pet, an object with obvious edges: the model knows exactly what you meant to keep, even against a cluttered street or a patterned wall.
A little care with the input still helps. Prefer a decent resolution — very small or heavily compressed images give the model less to work with along edges — and a subject that stands out from its surroundings.
Where it struggles — and how to refine the edges
No automatic tool is perfect, and three cases are genuinely hard:
- Glass and transparent objects. The model can’t tell what should show through, so a wine glass or a bottle often comes back part-solid.
- Same-tone subjects. A grey cat on a grey couch, or a pale dress against a white wall, gives the model too little contrast to find the edge.
- Very busy scenes, where even a person would hesitate over where the subject ends.
When the model is unsure it can overshoot and erase almost everything. The tool watches for exactly that: if the first pass keeps almost no pixels, it quietly retries the same image on a larger, more careful model and shows “Refining…” while it works — so a near-empty result usually fixes itself. If your background is actually a flat colour or a smooth gradient — game art, a logo, a product already on white — the AI is overkill, and the deterministic colour eraser clears the background by colour without ever over-removing fine foreground detail like grass or thin strokes.
Exporting a transparent PNG
The output is an image with a transparent background, ready to drop onto any colour, another photo, or a product page. By default you get a small transparent WebP, which keeps the alpha channel at a fraction of PNG’s weight — handy when the cut-out is headed back onto the web. Tap PNG when you need the widest compatibility or a lossless master; both formats stay fully transparent. If you’d rather not keep the transparency at all, flatten the subject onto white, studio grey or black before you download. For where each format actually pays off — and the places transparency tends to break — read the guide to making a transparent PNG.
Common uses for the transparent result:
- Product shots on a clean or branded background.
- Profile and team photos that need a consistent look.
- Stickers, cut-outs, and thumbnails for social posts.
- Design mockups where you need the subject isolated.
Doing a whole batch
If you have several images, you don’t need to repeat the process one at a time — the tool accepts a batch, processes each image, and lets you download them all at once as a zip. On a batch it warms up your GPU in the background after the first image, so the rest run noticeably faster. You can also preview each cut-out against different backdrops (transparent, white, or a neutral studio grey) before you export.
After the cut-out
A transparent PNG is often larger than you’d expect, because PNG stores the transparency channel. If you’re putting the result on the web, run it through the compressor afterward — it keeps the transparency while cutting the file size. And if you need a different format or size, convert or resize it in the same browser session.
Try it now — Remove background in your browser, nothing uploaded.