Formats
PNG vs JPG: which should you use?
One is lossless with transparency, the other is tiny and made for photos. Pick the wrong one and you get a bloated logo or a blurry snapshot. Here is the rule.
Last updated July 23, 2026
The one difference that decides it
PNG and JPG were built for two different jobs, and almost every “which format?” question comes down to a single question about your image: does it have sharp edges and flat colour, or is it a photograph?
- PNG is lossless — it stores every pixel exactly and supports transparency. That makes it perfect for logos, icons, screenshots, diagrams, and anything with crisp text or hard edges.
- JPG is lossy — it throws away detail your eye barely notices to make photos far smaller. That makes it perfect for photographs and busy, colourful scenes, but it has no transparency and it smears fine text.
Use the wrong one and you feel it immediately: a logo saved as JPG gets fuzzy halos around the letters, and a photo saved as PNG can be five to ten times larger than it needs to be.
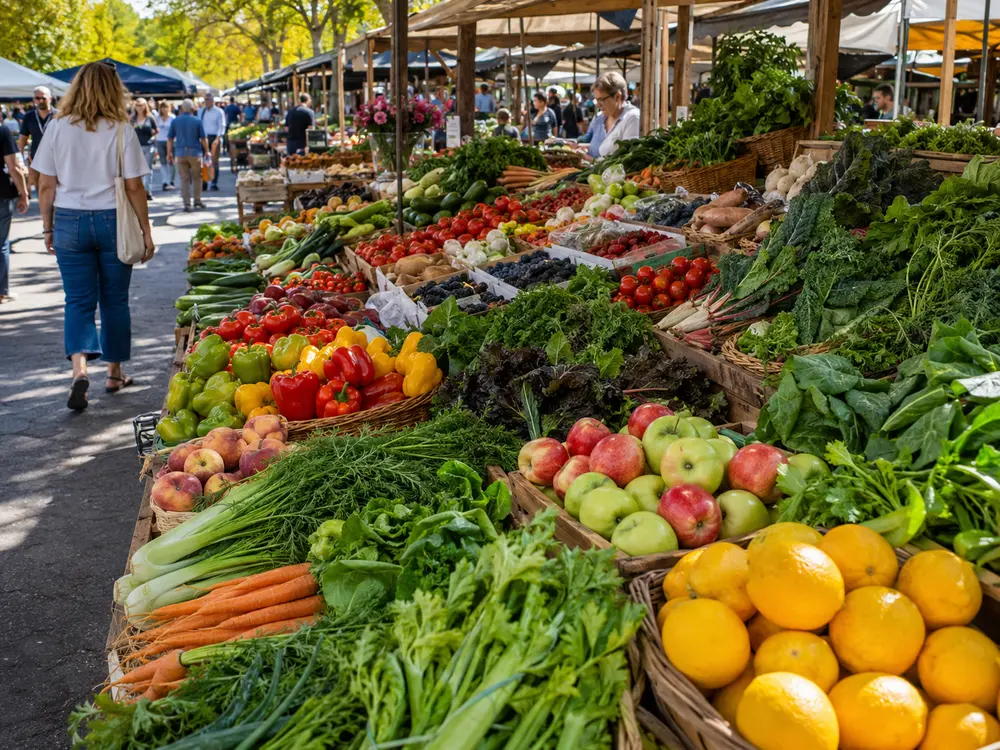
The same 1448×1086 photograph, saved both ways. Real measured files:
| Format | File size | Relative |
|---|---|---|
| PNG (lossless) | 808 KB | 2.6× larger |
| JPG (quality 80) | 313 KB | 61% smaller |
For a photo, PNG stores every pixel exactly and pays for it — JPG is under half the size with no visible difference. Flip the image to a logo or a screenshot, though, and the result reverses: PNG stays crisp while JPG smears the edges. That reversal is the whole rule.
Side by side
| PNG | JPG | |
|---|---|---|
| Compression | Lossless (pixel-perfect) | Lossy (discards detail) |
| Transparency | Yes | No |
| File size on photos | Large | Small |
| Sharp text / edges | Stays crisp | Blurs, shows artifacts |
| Best for | Logos, icons, screenshots, line art, flat colour | Photographs, complex scenes, gradients of real light |
| Re-saving | Safe — no quality loss | Each save loses a little more |
The rule of thumb
If you only remember one line: photos go to JPG, everything else goes to PNG.
A slightly longer version that covers the edge cases:
- Does it need a transparent background? PNG. JPG can’t do transparency at all — it fills the gap with white.
- Is it a photograph or a rich, detailed image with no hard edges? JPG. PNG will be huge for no visible benefit.
- Is it a screenshot, logo, icon, chart, or anything with text? PNG. JPG will muddy the edges.
- Will you edit and re-save it repeatedly? PNG. JPG loses a little quality on every save, and it stacks up.
Watch out for these traps
Screenshots. People habitually save screenshots as JPG and wonder why the text looks soft. Screenshots are full of sharp edges and flat UI colour — the PNG use case exactly. Keep them PNG.
“I’ll just convert PNG to JPG to save space.” That works for photos, but converting a logo or screenshot to JPG trades a small size win for visible edge artifacts. If size is the problem, a lossless compress pass or a modern format is usually the better fix.
Re-saving JPGs. Every time you open a JPG and save it again, it re-compresses and degrades a little more. If a file will go through several rounds of editing, keep the working copy as PNG and export JPG only at the end.
There’s a third option that often beats both
PNG and JPG are the classics, but WebP frequently wins on both fronts at once: it does lossless and lossy, it supports transparency, and it typically lands 25–35% smaller than an equivalent JPG. For a photo that also needs a transparent background — something neither PNG nor JPG handles well — WebP is often the clean answer. AVIF pushes file size even lower on photos.
If you’re weighing the newer formats, the WebP vs AVIF guide breaks down when each one is worth it.
Convert either way, on your device
You’re never locked into a format. Drop your image into the converter, pick PNG, JPG, WebP, or AVIF, and adjust the quality until the size and look are right. For JPG and the lossy formats there’s a quality slider; for PNG you get lossless output by default.
Everything runs on your own device through your browser — nothing is uploaded, and there’s no account. That also means a whole batch stays private and finishes without an upload wait.
A quick note on scope: Ruah converts between PNG, JPG, WebP, AVIF, and static GIF. Phone photos in HEIC are not supported — if you’re working from an iPhone export, save or share it as JPG first, then bring that in.
A good default workflow: keep your master as PNG if it has transparency or sharp edges, export JPG or WebP when you’re publishing to the web, and reach for AVIF on your largest photos when every kilobyte counts. If privacy matters, run the file through the EXIF data remover on the way out to strip hidden camera and location data.
Try it now — Convert in your browser, nothing uploaded.