AI
How AI image upscaling works — and when to use it
A plain resize guesses the missing pixels; an AI upscaler reconstructs them. Here is what that difference really means, when it helps, where it cannot, and how to run it in your browser with nothing uploaded.
Last updated July 26, 2026
Resizing guesses — upscaling reconstructs
If you enlarge a small image with an ordinary resizer, you already know the result: soft, a little mushy, never quite sharp. That’s not a bad tool — it’s the honest limit of interpolation. To fill a bigger grid, the resizer averages the pixels it already has. It can smooth the gap between them, but it can’t add detail that was never captured, so edges blur and fine texture washes out.
An AI upscaler works differently. It’s a neural network trained on millions of low- and high-resolution image pairs, so instead of averaging, it predicts what the missing detail most likely was — sharpening edges, rebuilding texture, and cleaning up some of the softness and compression noise along the way. It’s still a best guess, but a far more informed one than blurring between pixels.
| Plain resize | AI upscale | |
|---|---|---|
| Method | Averages nearby pixels (interpolation) | Predicts detail with a trained model |
| Enlarging | Soft, blurry, mushy | Sharper edges, rebuilt texture |
| New detail | None — can’t invent it | Plausible reconstruction |
| Speed | Instant | Seconds (GPU) to a while (CPU) |
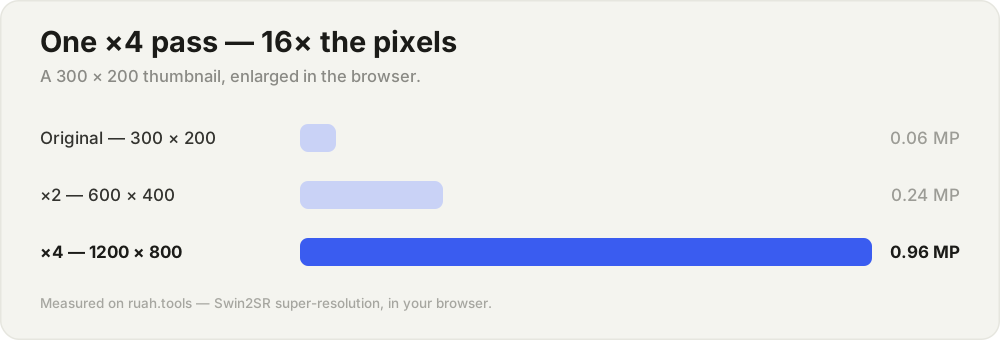
One ×4 pass turns a 0.06-megapixel thumbnail into 0.96 MP — sixteen times the pixels. Measured on ruah.tools.
×2 or ×4 — which to choose
Upscale offers two scales, and the right one depends on how far your source has to travel.
- ×2 doubles each side, so four times the pixels. It’s the quick, subtle option — good when the image is already decent and you just want a cleaner, larger version. A 600 px graphic becomes 1200 px.
- ×4 quadruples each side, so sixteen times the pixels. This is the dramatic one: it turns a thumbnail into something usable. It leans on a larger model and takes longer to run.
A simple rule: if the source already looks fine and you want a modest bump, start with ×2. If it’s genuinely small or low-resolution, reach for ×4. You can always re-run at the other scale and compare — changing the scale re-processes the image, while changing only the export format does not.
What it’s great at — and where it struggles
AI upscaling is not magic, and being honest about its limits is what keeps your results looking good.
It shines on: illustrations and line art, logos, product shots, AI-generated renders, and photos that are merely a bit soft or a bit small. Clean sources with clear shapes are exactly what the model was trained to rebuild.
It struggles with: heavy JPEG artifacts (it may sharpen the blocky compression instead of hiding it), very small faces (invented features can look uncanny), and dense text (letters can get subtly reshaped). And it will never recover detail that’s fundamentally gone — a 50 × 50 blur will not become a crisp portrait. This is reconstruction, not clairvoyance, so always start from the best source you have, not a tiny copy.
It runs entirely in your browser
The whole thing happens on your device. The model runs on WebGPU where your browser supports it, and falls back to WebAssembly on the CPU otherwise. Your image is never uploaded — no server ever sees it.
There is one honest cost. The first time you use each scale, the browser downloads that model once (the ×4 model is the larger of the two) and caches it for every run afterward. On a GPU an upscale takes a few seconds; on the CPU fallback a large ×4 job can take much longer, which is why the work runs in a background worker — the page stays responsive and you can queue up a whole batch.
A sensible workflow
An upscaled image has more pixels, which means a heavier file. So the last step is usually to bring that weight back down:
- Start from the largest, cleanest source you can find.
- Upscale to ×2 or ×4 depending on how far it has to go.
- If it’s headed for the web, convert to WebP or AVIF and compress — the same detail, a fraction of the bytes.
And if you were about to enlarge a photo with a resizer and accept the blur, don’t — that’s exactly the job an upscaler does better. For the other direction (making images smaller without losing quality), see how to resize the right way.
The short version
A resizer interpolates and an AI upscaler reconstructs, so for enlarging the upscaler wins. Pick ×2 for a modest, clean bump and ×4 to rescue something genuinely small. Expect great results on illustrations, renders, and lightly-soft photos — and temper expectations for heavy artifacts, tiny faces, and text. It all runs in your browser with nothing uploaded, so start from your best source, upscale, then convert and compress for the web.
Try it now — Upscale in your browser, nothing uploaded.